
Finishing an RPG Maker project isn’t easy. Releasing a game of sufficient quality is an achievement few will accomplish. Be one of them!
RPG Maker is easy to learn, but hard to master. Many people who start using the engine can put together some maps, events and battles within a few days. Then, they might make a plan for a full game based on the capabilities and limitations they’ve seen.

However, most people will soon recognise that it’s very hard to stick to a project and finish it. As a creative person playing some of the awesome, downright addictive games that are being released these days, you constantly get new inspiration that sparks an urge to start yet another game project.
I know what I’m talking about: I started working (or rather: playing around) with RPG Maker in 2001, but released my first game in 2014. That’s 13 years of not getting anything done.
But finishing a game really is a worthwhile goal. You know, starting new projects may be exhilarating, but seeing other people play your game is even better, trust me!
And so, let this be your new year’s resolution: Finish a game! Oh, hold on. Why don’t we ramp up the challenge a bit while also making sure you don’t lose track (again)? The resolution shall thus be: Finish a game in 30 days!
Don’t worry, I’ll help you accomplish it with this handy guide.
Disclaimer: This doesn’t contain any RPG Maker tutorials. This guide assumes that you know how to use the tool already. If you don’t, there are many great articles and videos out there for you to learn everything from the basic functions to coding your own plugins. (We probably won’t need the latter here, though.)
Your 30-Day Plan
As you may have guessed, we’re not aiming for an epic 60-hour open-world JRPG here. We’re going to make a fun little game — one you can be proud of nonetheless. Many great games are short and simple, right?

That said, creating even a 2-hour game within 30 days is a crazy project and requires a lot of discipline. But I think that’s actually the key, and I hope you’ll see why.
In addition to creativity and discipline, we’ll also need tools. I recommend Notion and Todoist to keep track of your project and its timeline.
With that ready, we should start the project by …
Day 1: Brainstorming
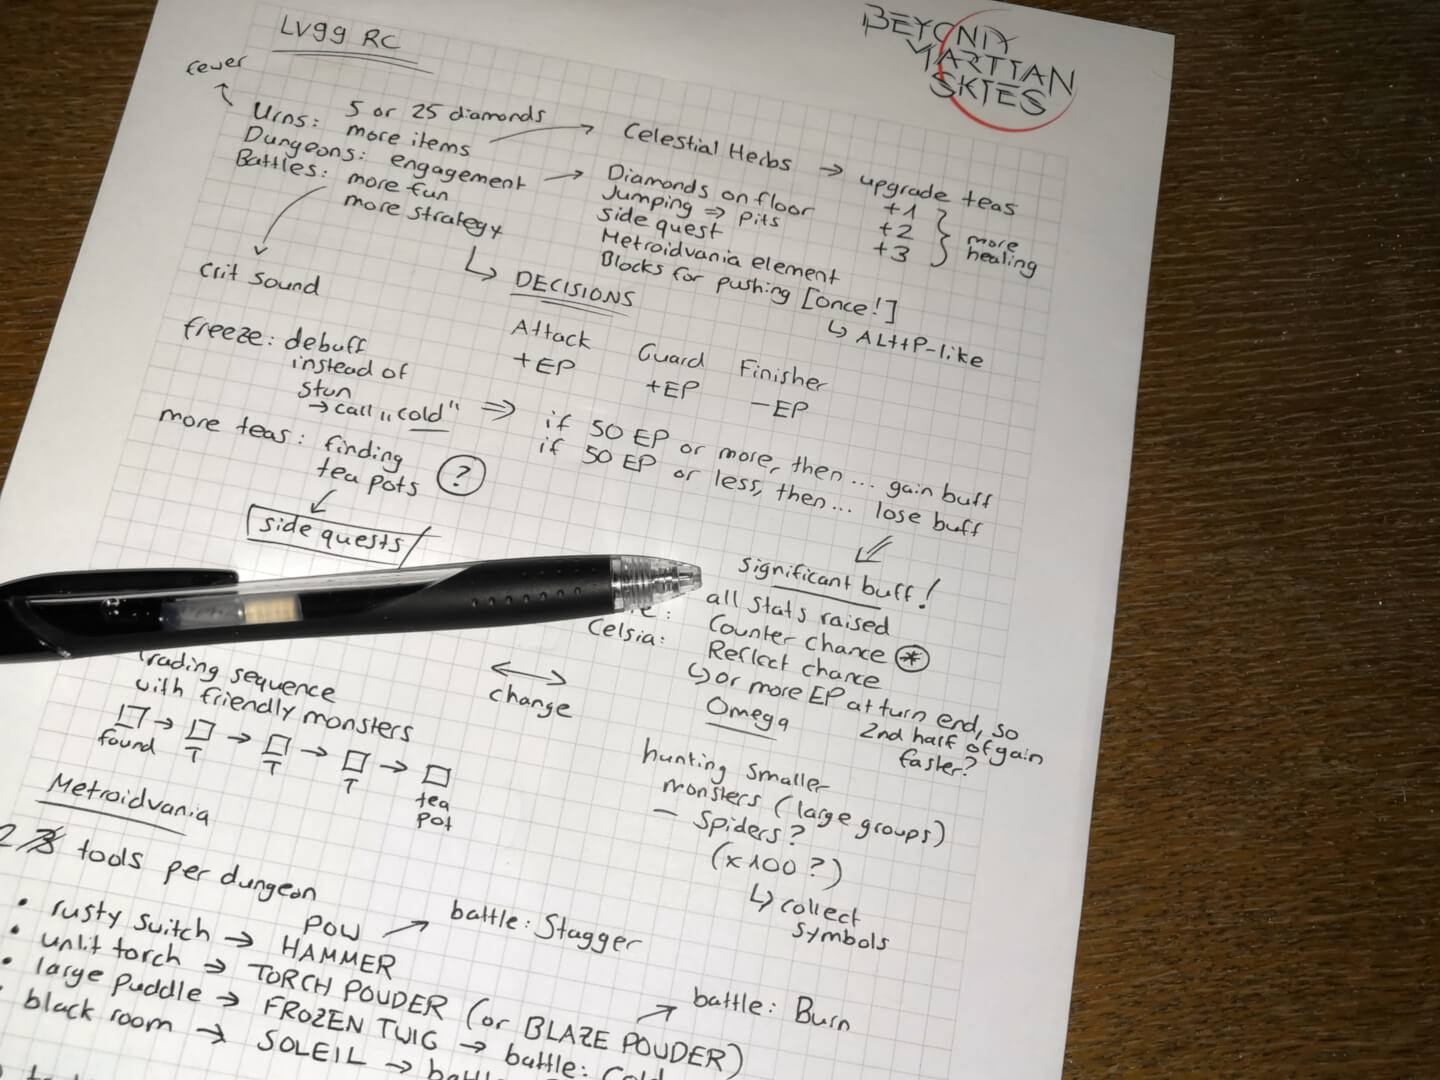
First of all, we need to collect ideas. What game do we even want to make?
As a JRPG fan, you might be very interested in convoluted stories, but it’s generally advisable to start with the gameplay. So, ask yourself:
- Which game mechanics do you like in other games?
- Which do not like at all?
- What kind of battle system do you want? A classical turn-based system, an ATB, a CTB, maybe even an action battle system (even though it’s very hard to pull off in RPG Maker)?
- What classes does the party consist of?
- What skills should be in the game, what elements, buffs and debuffs?
- What consumables and collectibles might we need? Any ideas for key items yet?
- What types of equipment do you like?
- What kinds of common enemies and bosses should there be?
- What environments should the player traverse?
- How would you describe the visual style of your ideal RPG Maker game?
- Any preferences regarding the music and sound effects?
After filling a few pages with notes about those things, we should start thinking about the plot of the game. Remember that we want to keep things as short and simple as possible. That said, there may be some key moments you definitely want the player to experience:
- An epic battle between two kingdoms?
- A betrayal?
- A presumed death and return of an especially cool and powerful character?
- Slaying a god in the finale?
You may want to describe the main character in some more detail too, outlining his or her strengths and weaknesses as well as the character development. Maybe you even have some title ideas already? Write it all down!
At the end of the day, you should have way more notes than you could possibly work into a single game. And we don’t need to. We have only created ourselves a pool of ideas we can draw from during the following phases.
Days 2 and 3: Concept
We want to spend the next two days revising and streamlining our brainstorming notes in order to create a rough concept.
Find the elements you really, really want to include in your game — while still not forgetting that it’s supposed to be a short and simple one! — and copy them into a separate document or onto a separate Notion page.
Next, order the elements thematically or chronologically (in terms of progressing through the game), whatever makes more sense to you.
The goal is to have one document or page that can be read as the description of the game. Another person uninvolved in your plans should be able to tell what the game is about story-wise and what gameplay elements and features could be expected.
You can write full sentences if you like, but for the most part, bullet points should suffice. Just imagine preparing for a presentation in front of a class full of gamers.
This step may not sound overly difficult, but you will probably find that it does, in fact, require two days.
Days 4 and 5: Story & Plot
I need you to remind yourself once again that we’re going to make a short and simple game now, as we tend to get carried away when writing the story and plot of our game. We may have very interesting characters and a very interesting world in mind with lots of possibilities for funny interactions, thoughtful discussions and thrilling conflicts. But we need to focus. Like, rigorously.
With everything you’ve written during the first three days in front of your eyes, try to think of the most basic story you can tell with it. Don’t worry: It will get more complicated anyway. It will happen almost on its own. But for the time being, just plan on telling the player about a single thing at the core of the world you’re planning to create.
In literary terms, you basically want to make a game about the one central chapter of a novel. So, which would be the most important one if your game were to be converted into a book?
If you have an idea, structure the plot around it into …
- the beginning (which must hook the player),
- the shake-up event (which compels the protagonist to travel),
- the adventure (long enough for gameplay mechanics to develop) and
- the finale (the final dungeon and the final boss).
Each of these sections should remain simple enough to be described in one sentence.
Day 6: Plugins
Despite our best efforts, chances are the ideas collected thus far, especially in terms of gameplay and visuals, won’t be simple enough to realise with the native functions of RPG Maker. Even if we know the limitations of the engine and keep them in mind while working on our concept, we probably need to dismiss a few elements and mechanics because RPG Maker just can’t do it.
Or could we somehow implement them after all?
Well, nowadays, there are plenty of plugins which can be used to enhance the capabilities of the engine. And with plugins, we might be able to make a much more interesting game that is closer to our vision.
I recommend the VisuStella plugin library for beginners. It consists of a multitude of plugins, but is still relatively easy to work with. (I actually wrote a blog article about it here.)

Take a day to go through it and see what it has to offer. Install the plugins you’ll need and revise your concept accordingly, removing what still can’t be done and adding what new ideas are getting sparked by reading the plugin documentations.
However, do still keep in mind, please, that we’re working on a — what was it again? A short and simple project. Do not add any plugins ‘just in case’. Restrict yourself to the ones you absolutely need. Maybe challenge yourself to keep the number below 15, including ‘Core Engine’ and tier-1 plugins.
Days 7 to 9: Game Design Document
A game design document is a document with detailled information about (almost) everything in your game. It includes:
- Characters
- Skills
- Items
- Equipment
- Enemies
- Buffs and debuffs
- Areas and locations
- Story and lore
- Side quests
- Mini games
- Visuals (like sketches and artworks)
- Audio (like tracks and instruments)
- Development schedule
- etc.
You get the picture.
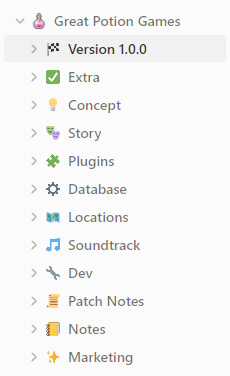
This is where you turn your rough concept into an actual plan. I highly recommend Notion to do this, where you may want to create a separate page for each category and give it an adequate icon.
To do this thought- and carefully, this guide grants you three days. You could outline sections on day 1, fill them with information on day 2 and revise everything on day 3.
Day 10: Resources
With our game design document finished, we have a pretty good idea what graphics and audio files we will need. We won’t know 100% and will probably add quite a few assets to our resources folder later, but on this day, we want to collect everything we can so we have a lot of the material ready when actually working on the game.
Things you may want to select at this point:
- Actor sprites and faces
- Skill, item, equipment and state icons
- Enemy sprites
- Animations
- Tilesets
- Title and game-over screens
- Title, battle, boss battle and some scene/emotional BGMs
- Basic BGEs
- Basic SEs
The rest could or should be added later. For example, we’ll need sound effects for the animations, but we’ll create those at a later point and need to find SEs that match as well as possible.
This will take quite some time. You may not be able to collect everything in one day, but that’s okay. If you struggle to find assets you like, use placeholders for the time being.
Days 11 to 15: Database
We will spend 5 days working on the database of the game.
You can make your own plan according to the number of elements per tab you’ll need, but for the average game, I think this schedule will work:
- Day 11: Actors, classes, some of the skills, states and animations
- Day 12: The rest of the skills, states and animations
- Day 13: Items, weapons, armours
- Day 14: Enemies, troops
- Day 15: Tilesets, system settings, types, terms
Please note that 5 days may or may not be ambitious. If you’ve actually managed to keep the concept as simple as it should be, this phase should be a lot of fun. If not, well, you may want to consider removing a few more elements. These 5 days may actually be a pretty good test whether or not the scope of the game is as streamlined as necessary to complete the second half of this project on schedule.
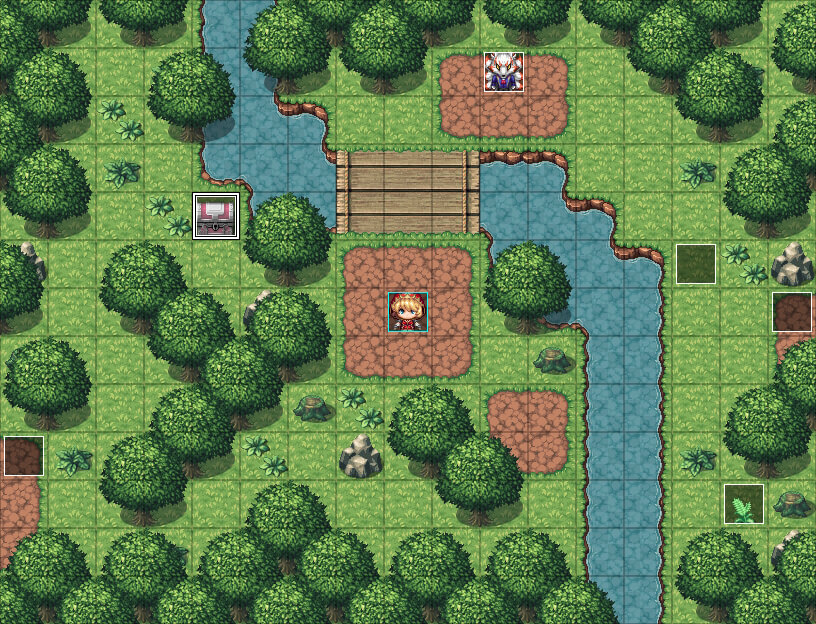
Days 16 to 25: Maps & Events
This phase is basically the core of it all: We will finally start creating the playable game itself.
I would like to say once more that we want to keep things short and simple! We don’t need the most beautiful maps or the most touching dialogue yet. What we need is a game that can be played from start to finish. Leave all the inconsequential stuff aside, we’ll take care of it later.
Since I have no idea what your concept consists of, this section must necessarily remain rather vague. I can only tell you to create the maps and events for your game now, and do so within 10 days.
Therefore, your first step should be making a plan: Separate the work into 10% segments. There are two ways of doing this, which I would call the horizontal/linear and the vertical/layered approach, or, if we were to use culinary metaphors, the courses and the hamburger approach.
Make the Game in Courses
This approach follows the story of the game and cuts it into 10 episodes. We will try to finalise one episode per day, for example:
- Intro and tutorials
- Town 1
- World map
- Dungeon 1
- Key scene 1 (encountering the villain?)
- Town 2
- Dungeon 2
- Key scene 2 (raising the stakes?)
- Final dungeon
- Ending and credits
The advantage of this approach is that you have playable content at the end of day 1. The disadvantage is that you must commit to game mechanics and ways of coding and polishing without knowing your content completely and whether or not the methods you choose will work for all of the rest of the game.
Make the Game like a Hamburger
The other approach creates a foundation and then builds upon it. Like so:
- Maps 1 (maybe all the dungeons)
- Maps 2 (all the towns)
- Maps 3 (the rest of the maps, like the world map)
- Events 1 (maybe all the system events, like transfers)
- Events 2 (all the objects)
- Events 3 (all the characters)
- Events 4 (the rest of the events, like cutscenes)
- Lighting and weather
- Music and sound effects
- What’s left
The advantage of this approach is that we have a better overview early on. The disadvantage is that we need to wait until at least day 7 before having content that can actually be tested and evaluated.
Days 26 and 27: Playtesting
You will probably have playtested quite a few things already, but days 26 and 27 are fully dedicated to it. Play through your game as often as possible.
Reach out to friends and family and get them to play as well, because many bugs are only found by people not involved in the creation of the game. Tell them that they should try to break the game, encourage them to play in strange, arguably unintended ways.
Ideally, you record everything on video, since you may need to watch some scenarios being played a few times in order to catch the issue.
At this point, only fix the game-breaking bugs that would prevent playtesters from progressing. Minor issues should be fixed on …
Day 28: Bugfixing
This is where you work through your list of bugs that aren’t as severe, but still should be addressed before the release of the game.
You may find that some bugs can’t be explained and can’t be reproduced. Keep them on a list, though, so you don’t forget about them. Maybe you’ll receive some additional information later on that provides the crucial hint on what might be wrong with your code.
Be very careful when fixing bugs, though, lest you introduce new ones in the process!
Day 29: Polishing
The penultimate day of our endeavour is reserved for polishing.

Revise the database, the maps, the events and everything else once more and see if there’s anything you absolutely need to improve right now because those rough edges really bother you — and, more importantly, will most likely bother your players.
Day 30: Release
In an ideal world, we would take quite some time to prepare the release, creating texts and images and videos and making lists of platforms and tools we want to use and people we want to contact and connect with.
For this proof-of-skill-and-discipline project, however, we’ll try to do all of this today!
The good news is, we only need to release the game on a single platform, tell our friends and family and post an announcement on social media (Facebook, Instagram or X; if you already have the accounts, you should post on all three, of course).
Platforms you should consider for your release:
If you still have some time, you may want to think about additional indie-game platforms where people could be interested in the game and release it there as well.
Next Steps
So, the game is out. What now? Well, actually, there’s still quite some work to do post-release.
Support & Updates
First and foremost, we’ll wait for any player feedback, evaluate it and then possibly fix bugs and/or implement changes accordingly. Check the platform(s) you chose to publish the game regularly — ideally, multiple times a day, but of course, not everyone has the time to do so. React to comments, but do so professionally. If you’re getting particularly negative feedback, take a moment to reflect before writing a reply.
Should there be any letsplays of your game, watch them carefully and take notes. Compile lists of things you must do, should do and could do in order to improve the game. If you don’t have lists like that yet, it’s time to create them!

Provide continuous support, release patches with fixes and improvements from time to time — and try not to think about your next project just yet. Keep this game top-of-your-mind for at least a few weeks before moving on. (Of course, this only applies to a game of this scope and not to the more complex ones which you may need to improve and support for months or even years.)
Promotion
Even though this is a short and simple game, we do want to do a lot of marketing for it even after the release. We would like as many people as possible to play it, after all, and provide feedback that might be useful for our next project!
Things you could do at this point include:
- Creating a social media account (Facebook, Instagram, X) and posting once a week (or more often if you can)
- Publishing a trailer and/or other videos on YouTube (or even TikTok)
- Posting on forums (like RPG Maker Web or Reddit)
- Contacting letsplayers, streamers, indie-game supporters and webzines (they may at least follow you on social media)
- Uploading screenshots on image platforms (like Imgur)
- Running ads on social media
- Paying for a professional letsplay (via Fiverr)
There are hundreds of possibilities to get your game noticed by potential players. Take another day to brainstorm what you could do and what budget, if any, you’d be comfortable with.
Expansion?
Fixes and improvements are great, but what if the players and you, the developer, actually like the game a lot? You may want to think about a proper expansion! A version 1.1.0 in semantic versioning.
An expansion could include new content like …
- actors,
- skills,
- items,
- equipment,
- enemies,
- maps,
- music,
- visuals,
- plugins,
- etc.
The list could go on for a while.
Should you want to work on an expansion, you could actually use this guide again: Start with brainstorming, make a concept, update the game design document, then work with all your discipline on implementing the new content on a schedule (and I really think the schedule should be relatively tight to maintain momentum). Release, promote, take note of feedback, update.
Conclusion
And that’s it! You have successfully released your first RPG Maker game in 30 days that people enjoy playing and maybe even made some post-release improvements based on player feedback! You’re now officially a game developer. Congratulations!
But don’t stop here. Continue creating! Let’s see how much better your second project is going to be with the experience you’ve gained.
***
How did you like this guide? Will you try to follow it? Have you followed it successfully? If you’re still not motivated enough to give game development a serious try, why not? What’s holding you back to make your dreams a reality? Could this article about indie dev motivation help?
If you actually finish a project using this guide, please let me know too! I promise I will play your game (if it’s as long as it would be expected for a 30-day project) and showcase it on social media (if it’s appropriate).